How to Install Wax Ring on New Toilet
Tom Lohr is an avid home DIY enthusiast. He prefers to spend the money he saves on new tools and gardening supplies.
Your Throne, My King
Tom Lohr
Don't Flush Money Down the Toilet
Every home has a queen or king. With royalty in the house, you need a throne. No place to sit in your home screams throne like your porcelain seat of power; the toilet. Often, it not only emanates your eminence, but is the only place that you get a few minutes by yourself. Both of those reasons have given the toilet high status in the world of household fixtures. If you need to reminded of just how important this seat is, try not using it for a day.
Unfortunately, even the most mighty of thrones wear out, become outdated, out of fashion or environmentally unfriendly due to the amount of water used. Whatever the reason, there is a 100% chance that sometime in your life, you will have to replace your toilet. While it can be a daunting task, with images of overflowing sewage running through your head, it really is one of the simplest plumbing tasks you can tackle. A average toilet replacement can cost you well over $300, and sometimes much more. By doing it yourself you can have a brand new, shiny toilet for just over $100.
The price for a DIY installation is highly dependent on the replacement toilet you buy. The least expensive at the big box stores is around $100. There are some that range near $500, but trust me, you are not that important, get the cheap one. It flushes just as well.
Once you have picked our your new toilet and lugged it home (it is always best to take some help with you) it is time to get cracking and put if in use. Here's how.
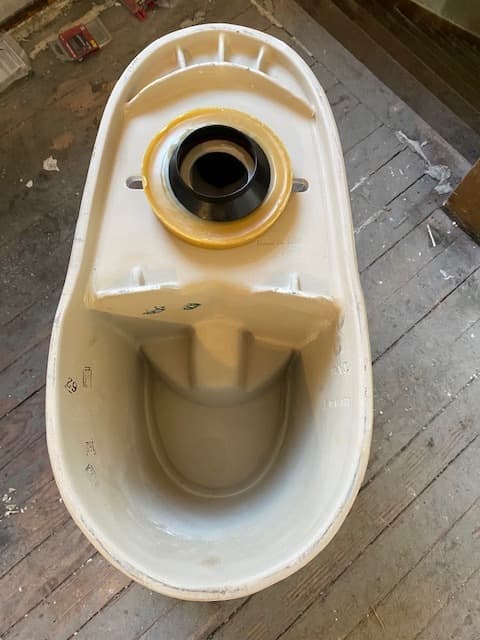
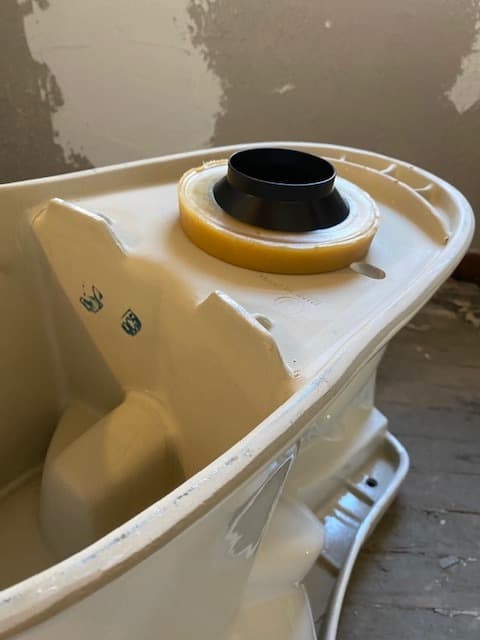
Toilet upside down with wax ring installed
Tom Lohr
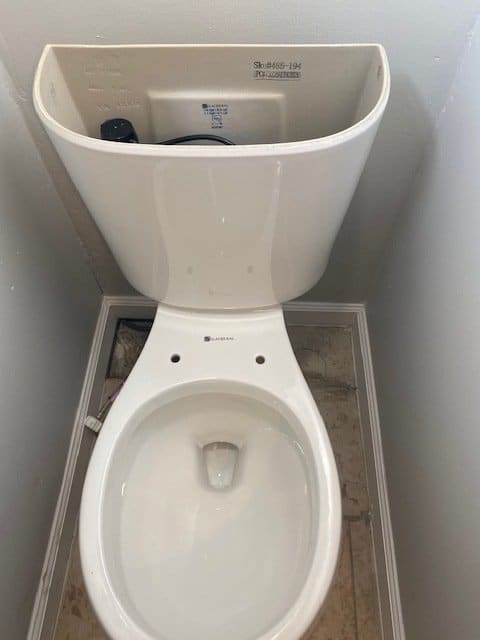
1. Stage the New Toilet
Before you even think about installing the new toilet, place it near the bathroom and unbox it. Ensure all of the parts are there and in good shape. Toilets are made mainly of porcelain, so getting a new one that is cracked is not outside the realm of possibility. Also ensure that you have all of the tools you need and that a wax ring is included. If you chose a toilet that is damaged, find out you don't have the right tools or didn't realize that it didn't come with a wax ring, and it is getting late in the day, you might end up having a night without a working toilet. This would be bad; ask anyone in your family.
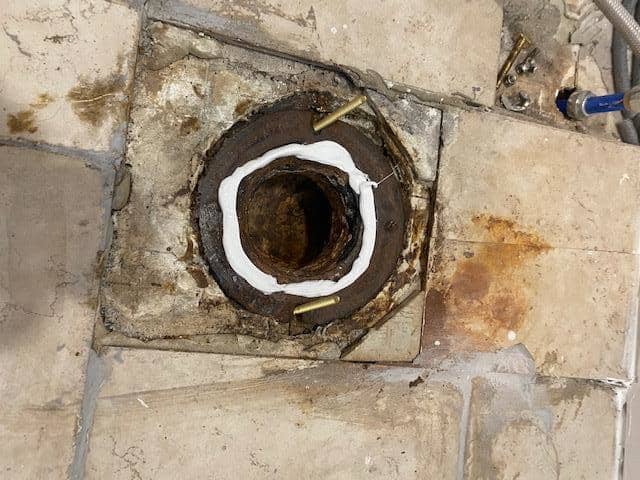
Old iron flange with bead of silicone caulk
Tom Lohr
2. Remove the Old Toilet
Removing toilets is even easier than replacing one. First you must ensure that you turn the water off. Every toilet should have its own shut off valve near the end of the hose that attaches to the bottom of the tank. Shut this off and test it; valves do go bad. Flush the toilet and after it has finished flushing ensure that it is not refilling with water. If not, then the valve is good. Flush it again until you get the most water out of the tank that you can. Unscrew and remove the end of the hose attached to the tank. Keep a towel under it to catch any water left in the bottom of the tank.
Place some towels around the toilet and use a cup and/or sponge to get all of the water out of the bowl. You will never get it all out, but you can get most of it. Keep the tank lid separate so it does not fall off and splinter. Remove the caps on top of the screws at the base of the toilet; there is one on each side. Unscrew the nut under the cap. It is either a wingnut or a normal nut. A common problem is that these nuts and screws are often rusted on and won't budge. Be prepared to use a hacksaw to cut them off if needed.
Once the nuts are removed, rock the toilet side-to-side, this will break the wax ring seal. Once the toilet is moving freely. You and a helper (you can do this yourself but not recommended) lift the toilet straight up. It should lift out with little effort, but it will be heavy. Clean up any spilled water and set the toilet outside or in the basement. If it still works you can list it as free on Craig's List and someone will claim it.
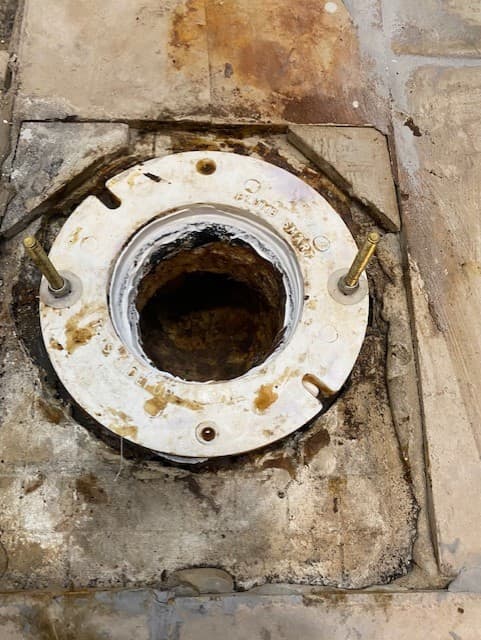
New plastic flange installed over old iron flange
Tom Lohr
3. Prepare the Flange for a New Toilet
Smell that? That hole that is now in the floor is a pipe that leads directly to the sewer system. Nothing to stop the smell, so stuff a rag in it if it is overbearing. All around the flange and on the floor are gobs of nasty wax. This is the remnants of the wax ring seal. Use a putty knife and flathead screw driver to remove as much of it as you can. It needs to be 90% gone.
After the wax is gone, inspect the flange. The flange will either be old cast iron or plastic pipe. If it cast iron and in bad shape (like the one in this tutorial), you need to install a replacement flange in the pipe. It simply slips in and has screws to tighten it so that it stays snug in the cast iron pipe. If your flange is plastic, make sure it is not cracked. If it is, replace it. If you do replace it ensure that the bolts, when installed will be in the same place as your old bolts. Use a marker and mark the floor to ensure you place them correctly. If you don't your new toilet will end up crooked. If installing a new flange, put a bead of silicone caulking around the top edge of it to ensure a watertight seal.
If you replace the flange, you may need to add some flange spacers. These are plastic rings that you can place between the flange and toilet to raise it up. This may be needed if the new or current flange is not sufficiently high enough to be level with the floor. This often happens when new tile is added. If the flange is not level with the floor, you risk not having a proper seal with the wax ring and could experience leaks. If you do need to add spacers, you will likely need to get some extended flange bolts. These are the bolts that are installed on the flange with the threads pointing up. The holes on each side of the base of the toilet sit on those bolt and the nuts hold it securely to the floor. If you add enough spacers, the bolts will not be long enough to add the nuts. Determine this before the local hardware store closes.
Once the flange is clean and ready, install the new bolts. They are installed upside down, with the head on bottom and threads pointing upwards. Slide the head of the bolt into the large end of the slot on the flange. Move the bolt along the slot so that the head ends up in the narrower portion and will not come out when lifted. Once the bolt is in the location that your old bolts were in, there is a small nut that will hold it in place. No need to over tighten this nut. It is used just to keep the bolt from moving. Repeat for the other side.
Proper seating of the wax ring
Tom Lohr
4. Prep the New Toilet for Installation
Gingerly unbox the entire toilet. Set the tank and tank lid far off to the side until you are ready for them. Do an inventory of parts. If your new toilet did not come with a new wax ring (most do) then get one before proceeding. Flip the toilet over and set it on the floor with the bottom pointed up. Press the wax ring into place. There is a sweet spot between setting the wax ring in its hole too lightly and pressing so hard that it deforms. It has to be pressed on hard enough that the stickiness of the wax will hold it in place when it turned right side up. If it dislodges while placing the toilet on the flange and it gets smushed, you will need a new wax ring.
Read More From Dengarden
Tightening the flange bolts
Tom Lohr
5. Set the Toilet
While this can be done by one person, it goes a lot smoother with two. Holding the toilet by the edges of the bowl, lift it up and set it onto the flange. You will need to ensure that the bolts sticking up from the flange are aligned so that they will pass through the holes on each side at the base of the toilet. Additionally, you need to ensure that the wax ring does not fall off while lowering the toilet. Even if lifting it by yourself, a second person to help spot the proper placement makes this part much easier.
Once the toilet is set on the flange, put a hand on each side of the edge of the bowl. Push downward while gently and slightly rocking the toilet back and forth. This motion will help the wax ring form a better seal, and the toilet will lower to the correct height.
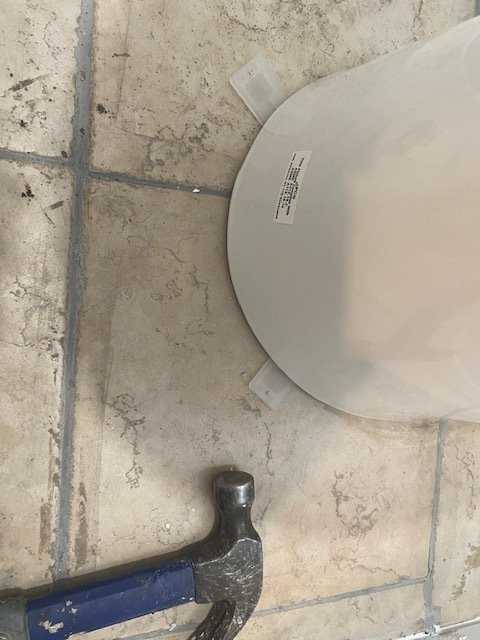
Leveling with toilet shims
Tom Lohr
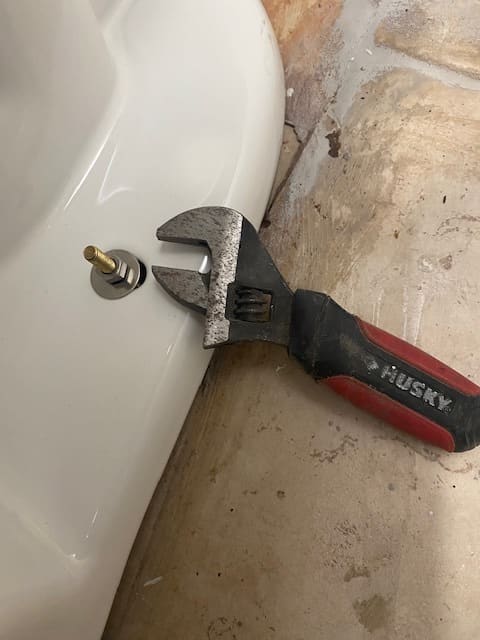
6. Tighten the Flange Bolts and Level Toilet
Depending on what brand toilet you purchased, place either regular nuts or wingnuts on the flange bolts and tighten until snug. Check the bowl for level. Tap in toilet shims to level the toilet. Continue to tighten the flange bolts until snug, alternating sides. Once it is snug on one side, the other side will be loose again until both are evenly snug against the flange. Check for level again and tap in the toilet shims to correct as needed.
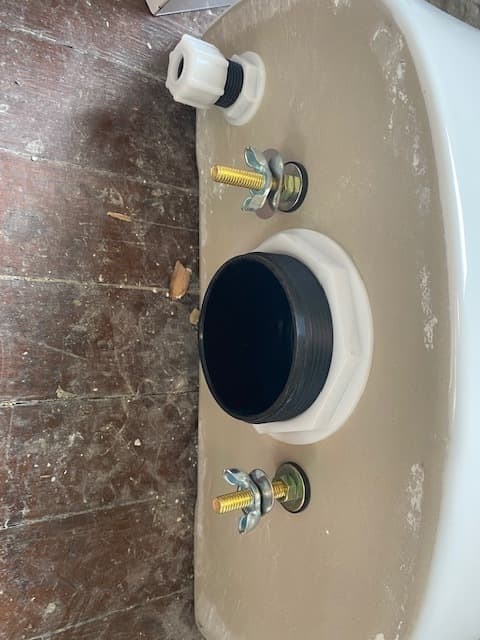
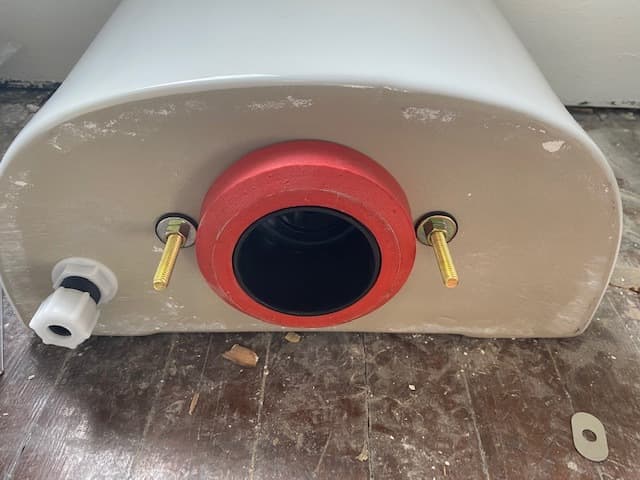
Underside of tank with plastic pipe and retention bolts installed
Tom Lohr
7. Prepare the Tank for Installation
The toilet tank is held to the back of the toilet by two bolts. Each bolt passes through a hole in the bottom of the tank. A rubber gasket/washer will keep water from leaking by after it is filled. After placing the bolt through the bottom of the tank, attach the included nut on the opposite side to hole the bolts in place.
The larger middle hole is for the large, short piece of plastic pipe. It should have a rubber gasket already on it or one should be provided. Ensure the gasket sits between the top of the pipe and the bottom of the inside of the tank. A large plastic nut screws over the pipe holding it snugly in place. Do not over tighten. In some models, this piece may already be installed.
That leaves one last hole in the bottom of the tank. The process for this smaller hole is the same for the large hole in the center. This is where the water supply line will connect once installed.
Place the large rubber/foam gasket over the large pipe in the middle on the outside of the tank. It should be able to stay in place without falling off when held upside down.
Rubber/foam gasket placed over plastic pipe
Tom Lohr
8. Install Tank
Hold the tank directly over the back of the toilet. Lower slowly. There are three target points to aim for. Each of the bolts extending down from the bottom of the tank need to slid through corresponding holes in the top of the back of the toilet. The large rubber/foam gasket in the center of the tank needs to sit flush against the large hole in the back of the toilet.
Once set, wiggle the tank around to get a good seal on the rubber/foam gasket. Using the provided wingnuts and washers, place a washer on one of the bolts on the bottom of the tank that are now protruding through the holes on the back of the toilet. Hold the washer in place with one hand, and tighten the wingnut until snug with the other. Repeat for the other bolt. Alternating bolts, tighten until snug. As the rubber/foam gasket in the center compresses, the wingnut will become loose. Keep repeating until both sides are snug and stay snug. Do not over tighten or you many crack the porcelain tank. Because both bolts are on the bottom of the tank near the back of the toilet, you will have a hard time seeing the wingnuts as your tighten them. Also, most toilets are close to a wall on at least one side, so space will be limited and cramped. You may have to channel your inner contortionist to complete this step.
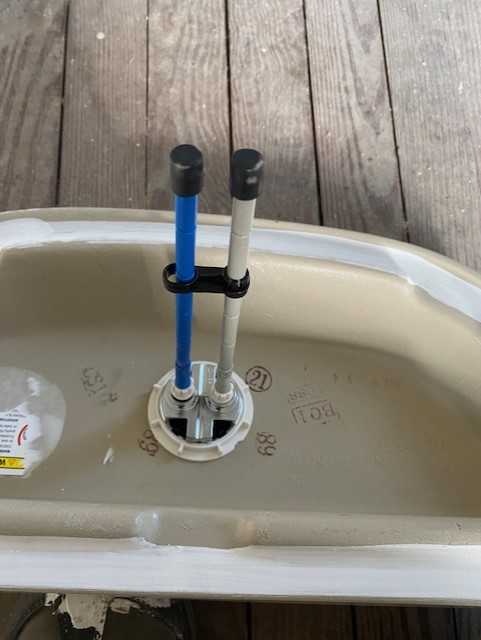
Underside of tank lid with flushing mechanism installed
Tom Lohr
9. Add the Tank Fill Mechanism
There are several types of float valves that fill the toilet tank to the proper level. Some are already installed in the tank, some have parts that need to be installed in the tank and a lever that needs to be attached to the tank. Do yourself a favor and get one that has a flush button on top of the tank. It has a large flush and small flush selection to save water. Plus, it is very easy to install. Just pass the flush mechanism through the hole on the top of the tank lid, flip the lid over and tighten after passing the large plastic nut over the flushing rods.
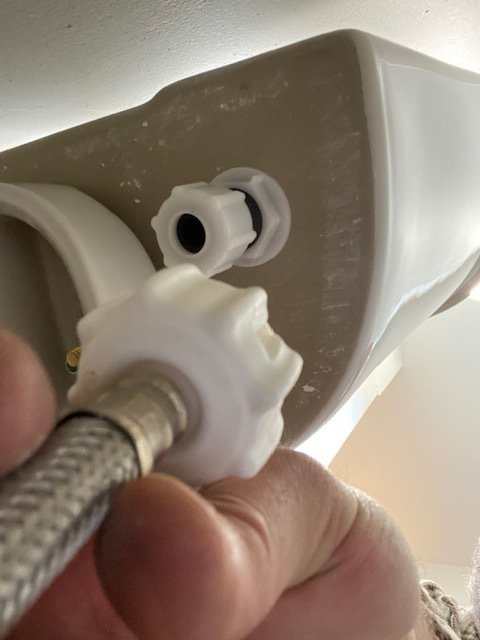
Water supply line and tank connection on underside of tank
Tom Lohr
10. Connect Water Supply Line
When replacing a toilet, it is always a good idea to replace the water supply line. If the old one fails, and they all eventually fail, you are in for some costly repairs. It is also a good idea to replace the shut off valve at the same time.
Screw on the plastic connector at the end of the water supply line to the plastic threaded connection on the bottom of the tank. Screw on until snug. Do not over tighten.
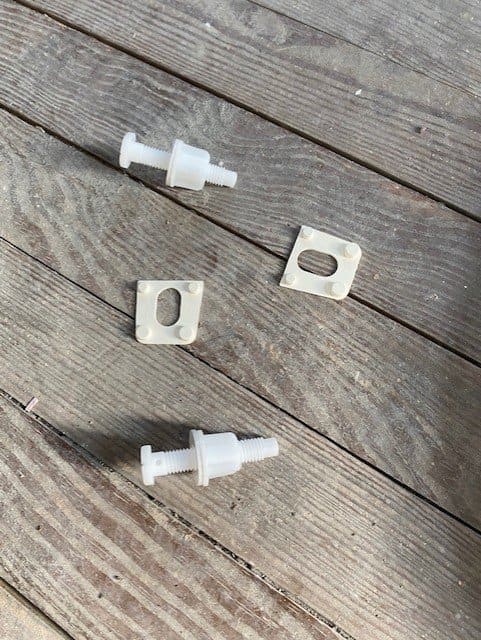
Parts for toilet seat installation
Tom Lohr
11. Test for Leaks
Do one last check for level, give every bolt one last twist for tightness and grab a towel and prepare for testing. Turn on the water supply line and watch the tank fill. There should be a fill line on the inside of the tank. If the water level is too low or too high, adjust the float to proper fill height.
Once the tank is filled and there are no leaks at the water supply line or from the bottom of the tank, give it a flush manually from inside the tank. Watch for leaks at the base of the toilet. If it leaks, the issue is likely a wax ring that did not seal correctly.
If there are no leaks, place the lid on the tank and repeat several times.
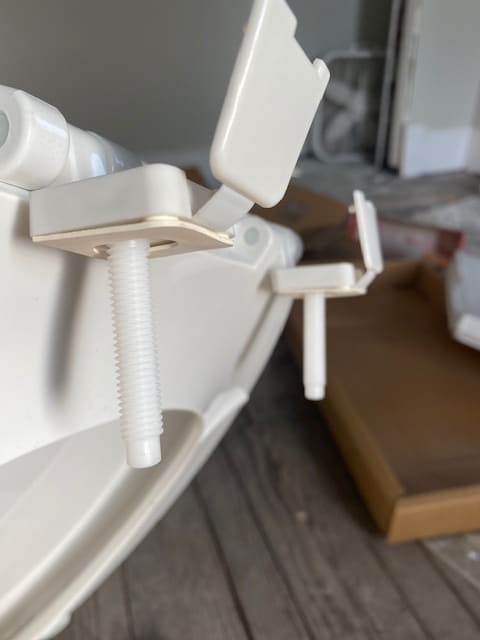
Parts attached to toilet seat
Tom Lohr
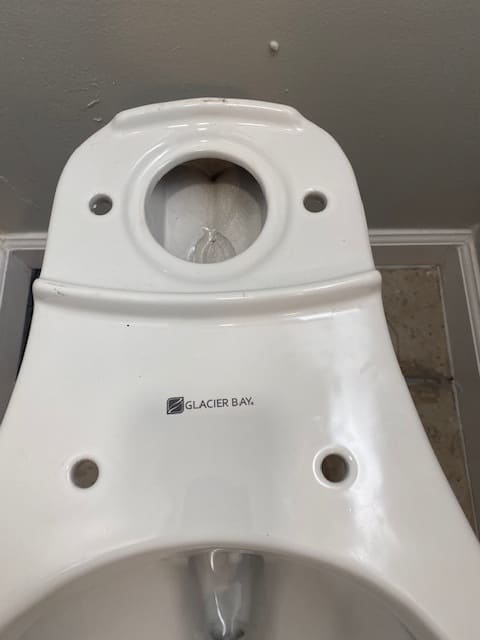
12. Install the Seat
I wish I could tell you that all toilet seats stay snug and in place forever, but in reality, they are cheap plastic things that wear out quickly. Get good at this procedure. You will replace ten toilet seats before you need to replace your toilet again.
The remaining two holes in the toilet are for securing the seat to it. Your toilet seat will have two hinges in back with square or rectangular openings. Each opening will have an attached cover that snaps into place. Place one of the included plastic washers in that opening and pass the large plastic bolts through the washer and the hole in the bottom of the square/rectangular opening.
A rubber bottom piece that is the same shape as the square/rectangular opening passes over the bolt and snaps into place on the bottom of the hinge. Place the seat onto the toilet ensuring that the two plastic bolts pass through the two remaining holes in the toilet. Use the included plastic nuts to secure the seat to the toilet. Do not over tighten.
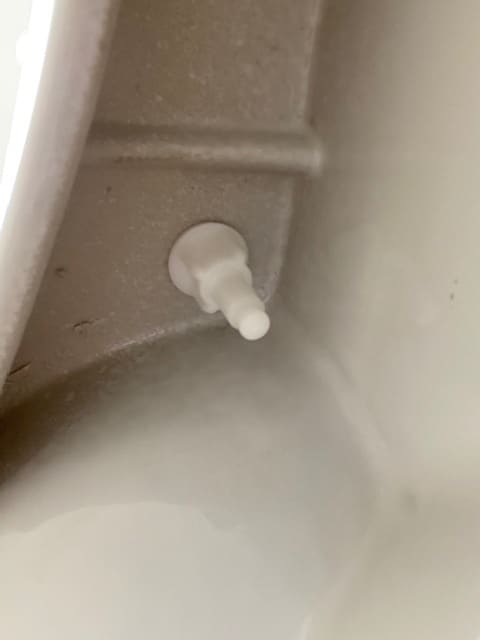
Toilet seat bolt on underside of toilet
Tom Lohr
13. Do the Big Test
Grab a roll of toilet paper, ask for some privacy and get down to business. If it passes that test, you are finished.
It's a crappy job, but you can do it
Tom Lohr
Be Your Own Plumber
There are times when I highly recommend hiring a qualified plumber. Replacing a toilet is not one of them. The bread and butter of many tradesmen is doing simple jobs and charging a bundle for it. While replacing a toilet may seem icky and unsanitary (it is), that is what they make soap for. Which you rather do: get a little dirty, or write a big fat check?
This content is accurate and true to the best of the author's knowledge and is not meant to substitute for formal and individualized advice from a qualified professional.
How to Install Wax Ring on New Toilet
Source: https://dengarden.com/home-improvement/How-to-Install-Your-Own-Toilet