How Long Does It Take to Install Granite Countertops
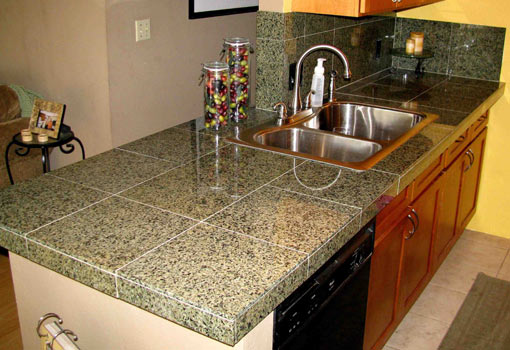
While granite is a popular choice for kitchen countertops, the high cost of materials and installation can put a big dent in your home improvement budget. A less expensive alternative to a pricey granite slab is to use 12" x 12" granite tiles instead.
Not only do granite tiles make an attractive and durable countertop, they're easy to apply and weigh much less than a solid granite top, making it a perfect DIY project.
Tools Needed:
- Level
- Square
- Tape measure
- Safety glasses
- Carbide tipped scoring tool
- Circular saw
- Drill with screwdriver bits
- Jigsaw
- Notched trowel
- Rubber padded grout float
- Sponge
- Stone polisher (rent)
- Tile saw (rent)

Materials Needed:
- 1/4 x 12" x 12" granite tiles
- 3/4" plywood
- 1/4″ or 1/2" cement backer board
- Screws
- Masking tape
- Thin-set mortar
- Unsanded grout
- Grout sealer
How to Install Plywood Substrate
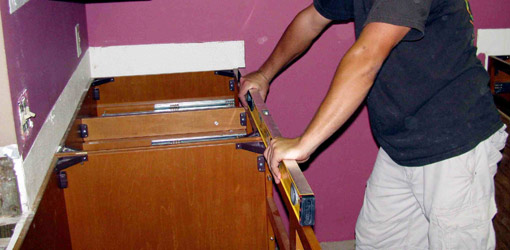
Begin by removing the existing countertops, then check to be sure the cabinets are level—both left to right and front to back.
Cut a piece of 3/4" plywood to serve as the base for the top, making sure to allow for the desired overhang. For a thicker look, double the plywood, or glue and screw a strip of wood along the outer edge of the top.
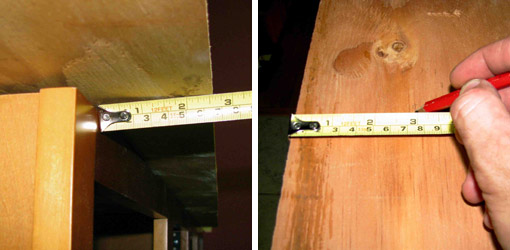
With the plywood in position, measure from the cabinet to the edge of the plywood. Transfer this measurement to the top of the substrate, adding half the thickness of the cabinet frame, and mark the location for the screws.
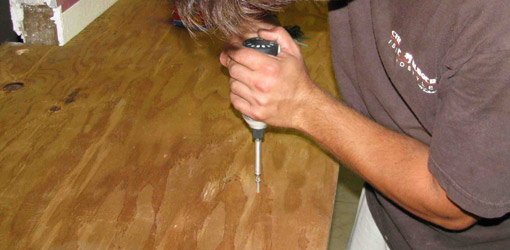
Drill holes and screw the plywood to the top of the cabinets.
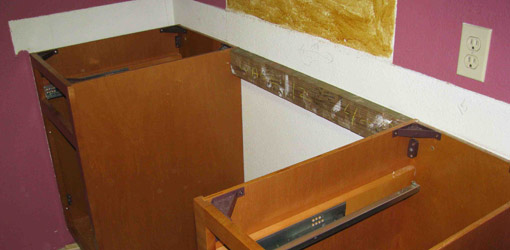
As an alternative, the plywood substrate can be screwed from underneath to brackets or a ledger strip located inside the cabinets.
How to Install Cement Backer Board
Once the plywood substrate has been screwed down, cover it with 1/4″ or 1/2" thick cement backer board. Cut the backer board to size by scoring it with a carbide tipped scoring tool and breaking it much as you would drywall.
While cement backer board can also be cut using a circular saw, it makes for a very dusty job, so work outside and be sure to wear a respirator and safety glasses. See our article on Tips for Cutting Cement Backer Board to find out more.

Screw the cement board to the plywood, being sure to countersink the screws below the surface. Cut 2" strips of cement board and attach them to the edges of the substrate flush with the top. Cover all joints in the backer board with mesh tape.
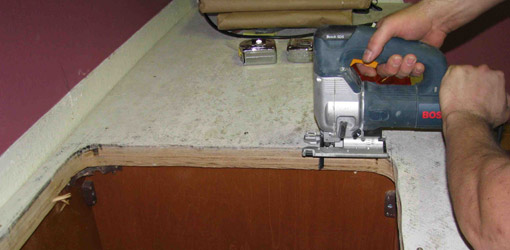
Cut the hole for the sink using a jigsaw. Most new sinks provide a template. Measure carefully to be sure the hole is centered over the base cabinet.
Fitting the substrate around the stove will vary depending on the type of cooking surface you have. A freestanding stove requires no substrate while a drop-in type will need backing between the stove and wall.
How to Polish Granite Tile Edges
Polish any exposed tile edges before installation using a polisher specifically designed for stone.
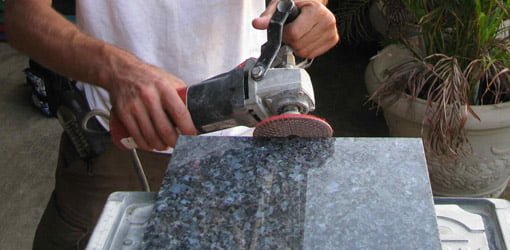
A stone polisher uses a series of coarse to fine pads. Begin with a coarse pad in the 50-150 grit range and work up to 3000-5000 grit.
Rough or sharp edges can also be rounded using the polisher. Both wet and dry polishers are best used outside, as the process can be messy.
How to Lay Granite Tile
Use a notched trowel to spread thin-set tile adhesive on the cement board substrate.

Lay full tiles on the outer edge first, butting them together. Remember to overhang the tiles to allow for the edging.
While granite tiles average 1/4" thick, individual tiles can vary. To compensate for thinner tiles, use a thicker bed of mortar. Check with a level as you go to be sure all the tiles are the same height.
How to Cut Granite Tile
Once the full tiles have been laid, use a tile saw to cut pieces to fit along the wall.

Both tile saws and polishers can be rented at tool rental centers.
Cutting Tip
If it's hard to see marks on granite tile, apply a strip of masking tape to the tile then use a pencil to mark the masking tape.
How to Install Tile Edging and Backsplash
When the top is complete, apply thin-set to the side of the cement board substrate and position the edge tiles. For a uniform look, align the joints with the top. Use tape to hold the edge tiles until the mortar has dried.

To form a backsplash, apply thin-set to the drywall and press the tiles in place.
How to Apply Grout to Tile
Even though the tiles are butted together, the narrow seams need to be filled with unsanded grout.
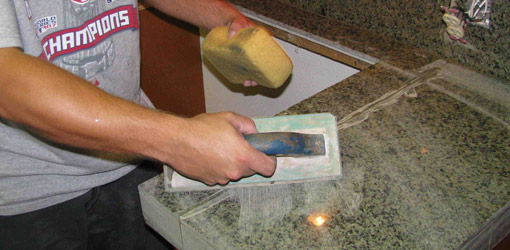
Use a rubber padded grout float to force the grout into the seams, then wipe off the excess with a damp sponge.
Once the grout has dried thoroughly, apply a high quality sealer to the seams to prevent stains.

Install the sink, faucet, and appliances to complete the job.
How Long Does It Take to Install Granite Countertops
Source: https://todayshomeowner.com/how-to-install-a-granite-tile-countertop/